Wednesday, March 9, 2011

Shabby Apple Dress Giveaway--NOW CLOSED

So I'm assuming that most, if not all of my readers have at least heard of Shabby Apple even if they don't own anything from ther yet...

If not, here is your introduction to Shabby Apple!!
You can find some of the most gorgeous, vintage inspired women's dresses at http://www.shabbyapple.com/ that I've seen...and they are all modest.  I am short (4'11" to be exact) and have a hard time with low necklines, but I don't see that problem with any of their dresses I've seen. 

I had a hard time picking my favorites to use in this post.  And what's great is that they even sell maternity dresses (called Mama Apple) and children's dresses (called Shabby Baby - isn't that cute).  Head on over to http://www.shabbyapple.com/ NOW to check out even more dresses.

Here are some of my favorite dresses...

And today, Shabby Apple is giving away the Cider dress to one of my lucky readers!
I love orange, and the neckline is so cute!

Giveaway rules!
**Must have a US shipping address
**Giveaway closes on Monday night (March 14th at 11:59pm)
**winner will be chosen by random.org on Tuesday, March 15th

Shabby Apple is being even MORE generous and offering an exclusive discount to our readers:
naptimecrafts10off Use this to score 10% off your order!

Mandatory entry -
* Must be a follower of my blog (http://www.naptimecrafting.blogspot.com/) - and leave a comment letting me know (with your email address if it's not linked in your profile)

Additional entries
* 1 entry - "Like" Shabby Apple on Facebook - and leave a comment telling me you did! - you'll get in on special promotions and exclusive deals if you do!
* 5 entries - Purchase anything on Shabby Apple and let me know you did!  (in 5 separate comments) You can use this awesome code for a 10% discount on your purchase -- naptimecrafts10off

That's it!  7 chances to enter to win this gorgeous dress from Shappy Apple!

Saturday, February 26, 2011

Yarn Words

After making my words of love, I wanted to make one for St. Patrick's Day.  I really wish I had spelled "lucky" but it wouldn't have laid flat on the mantle with a "y".  Also, I just couldn't get a good cursive "k" to shape.  But you get the idea...so try your hand at it and let me know if you get a good "k".  I'm probably going to add a "y" to the end soon, it's bugging me that it doesn't say "lucky"

Friday, February 25, 2011

Crochet: earwarmer and a hat!!!

I learned how to single crochet last year when we were making squares for quilts for the women's shelter at church.  But I haven't done anything since...until this past weekend.  For my first project, I made an earwarmer (it needs a flower or something, but I'm still working on that).  I used a smaller hook, so I only did 85 chains instead of the 91 in the pattern, and I didn't do as many rows of the decorative holes in the middle.  The nice thing about the holes is I can clip on a hair clip of my daughter's if I want an embelishment.
Then i tried my hand at making a hat.  I used this pattern, but I was making the 6-12 month size and somehow it ended up fitting my head instead.  I'm not sure what happened, but I counted my stitches the entire time and used the recommended hook size.  Maybe my gauge is off, but that seems like a huge difference...  oh well, I love the little button flap on the side! 

Thursday, February 24, 2011

2x4 and 1x4 Shamrocks

Under My Umbrella came up with another amazing 2x4 project.  Shamrocks!!
I decided to paint mine cream and mod podge scrapbook paper on the front instead of painting them green (I didn't have a good green on hand).  I also cut them in half (depth wise) so that they aren't so thick...and that means I got 2 out of what would have only been one.

She provides the dimensions for the large shamrock on her blog, but I also had some 1x4's on hand, so I made a smaller one.  If you want to make a smaller one too, here are the dimensions I came up with:


Friday, February 18, 2011

Box Zipper Pouch

I made 2 zipper pouches for family members at Christmas.  There are tons of tutorials out in blogland on these.  But the one I found was from here - I liked the finished dimensions. 

The tutorial gets a little tricky to follow, but just go for it and be prepared to use a seam ripper a few times until you get the process down. 

It was fun to make, but I think I would much rather make a zipper clutch like I did here

Friday, February 11, 2011

The CAT's Hat (for a toddler head)

I wanted to make this hat for my son - so I browsed online and couldn't find a tutorial that wasn't out of paper or that looked nice.  So from me to you...
Materials needed:
Red Felt
  - 3 red strips each measuring 3"x22"
  - 1 red circle 6.75" in diameter
White Felt
  - 2 white strips each measuring 3"x22"
  - 2 white circles each 13" in diameter (with a 6.75" circle cut out of the center)

The easiest way I found to get the opening centered was to fold the red and white circles into quarters and line up the corner and trace the red circle's outer line onto the white and then cut.
After you have your 2 white circles, sew around the outside rim, flip right side out and baste (use a longer, gathering stitch) both layers around the inner circle.
Sit the brim aside and then sew the red and white strips together, alternating colors (red, white, red, white, red).  Then I topstitched along the edge of each color (for 3 reasons . . . it give the hat more stability to stand up and hold its form, it looks more professional, and it keeps the seams on the inside laying nice and flat)  But topstitching is totally optional. 

Then you'll want to baste along the edge of the red strips on the ends.
Next, fold the stripes in half, matching up the colors and sew along the edge, making a tube.
Now to add the top to the hat tube.  Pin the red circle to the right side of the opening in the hat tube and sew.  I poked myself several dozen times in this step trying to sew, but since it's a circle, you should pin it a lot to keep the curve going nicely. (this is why we basted the red stripe, so you can pull the gathering string to adjust the edges to match up - you may need to baste around the red circle's edge as well - but I didn't need to.  After sewing, turn right side out.  See how nice that looks!
Now, we just need to sew the brim to the hat tube...using the same manner as the top, pin the brim to the hat tube at the bottom (right sides together) and then sew.  This is why we basted the red stripe and the inside of the white brim - in case one piece is larger than the other, you can pull the gathering stitches to make them match up while pinning. 

After the hat was all together, I also top stitched around the bottom red stripe and the white brim where the hat tube meets the brim.  I haven't top stitched around the outside of the brim yet...still deciding if I want a stiffer brim or a floppier one. 

This is a little big on my 2 1/2 year old, and it's too small for my head, but it sits on his head just fine
It's only a problem when he pulls it down over his head and then freaks out cause he can't get it back up.  If that's a worry for you, just make the circle you cut out of the center of the white brim smaller than 6.75"

Burp Cloths

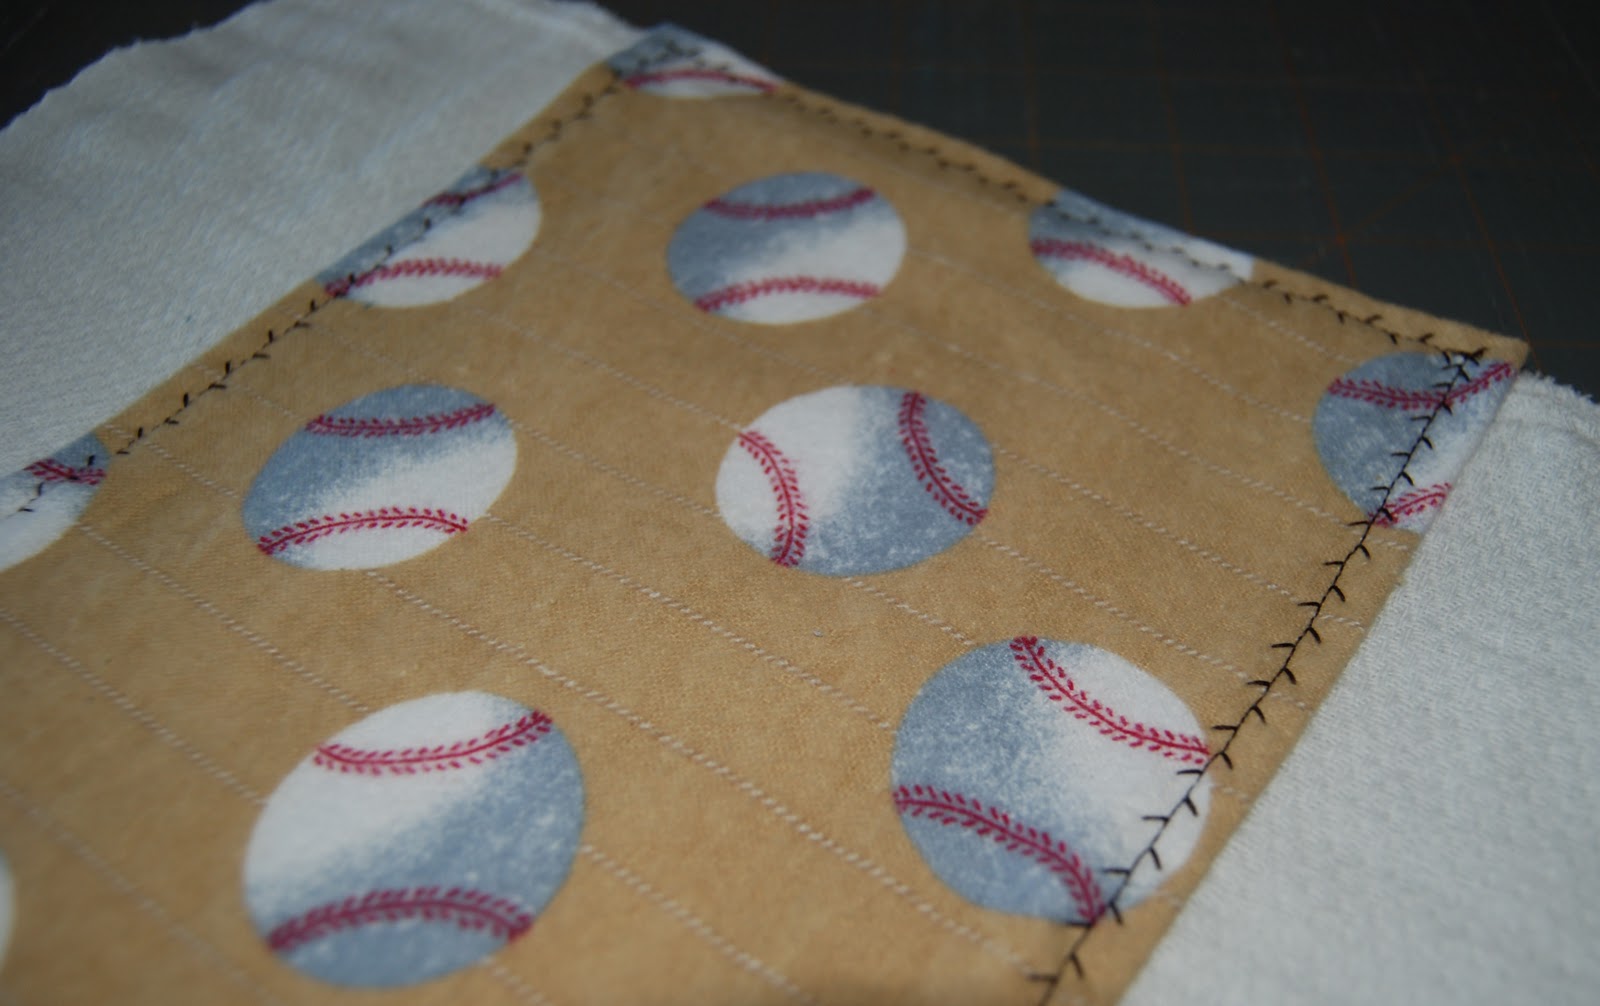
I wanted to try making these burp cloths when my daughter was born, but now she's not "burp cloth" age, so I made these for a friend.  I took some "pre-fold" cloth diapers and sewed a strip of flannel to the front to make it cuter.
I just measured the size for the strip of fabric and added a little for folding the edge under, like so...

Then sew into place.  I opted for a decorative stitch that looked just like baseball stitching.  If you are using dark thread, it will show on the back, so make sure your stitch looks nice from the back too.  Some look messy on the back side, so I would suggest to test it on a scrap of fabric first.

I didn't get a picture, but I made a receiving blanket out of the same fabric as well - with rounded corners and the same decorative stitch around the edges.  The blanket was made the same as this one...

Wednesday, February 9, 2011

Baseball Banner

I made this banner for a friend's baby shower.  She's decorating his room in sports theme, so I thought it would be a great decoration for the baby shower and his room.  I decided to make it out of fabric instead of paper so that it would have a longer life.

Here's what I did:
  • The white fabric was canvas and the blue was a soft type of denim - I wanted it to have some stability and I wouldn't have gotten that with standard cotton
  • I traced a bowl to get the circle shape, and then slid the bowl to each side to trace the line where I wanted the red stitches to go
  • I used embroidery floss to hand stitch the baseball lines
  • I used wonder under to applique the letters and stars and top stitched around the edge of the letters
  • Each baseball and pennant has a back side that I top stitched to the front to hide the stitching on the back of it
  • Before I sewed the backs to the fronts, I pinned the twine in place and then sewed through it when I stitched the backs and fronts together.
It was fun to make this, I may end up making another one to match my son's room.  I love how it turned out.

Monday, February 7, 2011

Heart Garland and Pillow Wrap

I decided I wanted a heart garland a couple weeks ago, so I dug through my felt stash and cut out a ton of little hearts.  I'm sure I cut out more than I used but my kids kept running away with them as I cut them, so I'm still finding more scattered around the house as the days go by.

After making the subway art pillow, I felt I needed something else on my other pillows.

I also made a wrap for my couch pillow.  My couch pillows are black, so I figured it was a good background to go with a wrap of hearts.  I will probably unstitch them and sew them onto a ribbon for next year though.  Right now, they are just tied together with the ends of the thread but it won't stay tight, so I'll probably sew them to a ribbon to be able to keep it tied on.  But I just did a fun decorative stitch as I fed the hearts through the sewing machine - which will make it trickier to pick out later :)
                         

Friday, January 28, 2011

Scarves

I made 5 scarves for family members this past Christmas.  Oddly, all the tutorials came from one person...Susan at Living with Punks.  I made 2 of the Mama Ruffle Scarves, one for my mom and one for my mother-in-law.  She also provieds a template for the Chrysi pin flower (I made mine about half the size though).  I also made one of these and attached it to a hair clip so I can wear it in my hair or on a headband.

I haven't really worked with knit fabric much, so this was kinda fun to try it out on these scarves.  They are really easy to make, but for some reason they took me a loooooong time.  I think I'm too picky with trying to get the ruffles evenly spaced and perfectly lined up along the edge of the scarf.

I also made 3 of the Lil' Dude Scarves.  2 for my nieces (I didn't take a picture of the fully finished scarves for some reason), and one for my father-in-law.  I opted not to add the pocket on the inside - just for sanity sake since I was making 3 and only had one nap time to do it in.  I also sewed my giant button hole/zig-zag stitch BEFORE I cut the opening.  I've tried the way in the tutorial where you cut the slit first and do a tight zig-zag stitch around the edge, but I could never get it to look clean and pretty.  So I sewed the lines first and then clipped between them.
Since the tutorial and dimensions were meant for kids, I had to get longer fabric and add an extra strip to the bottom for my father-in-law's scarf (finished, it was about 60" long instead of the 45" for the children's one).  My husband modeled it for me since I had to test the length on him to make sure it looked okay on an adult.
I think I've made him watch one too many seasons of "America's Next Top Model" since he was trying to "smize"...smile with your eyes.  Sorry Honey, I don't think Tyra would call that a smize :)